I love tomatoes.
In the summer, I mostly eat them raw - out of hand, chopped in salads, chopped with just a bit of herbs or salt to perk them up a bit. I slice them into salads, sometimes with little more than the tomatoes involved:

Last year I read a recipe in Food and Wine magazine for a tart that was little more than tomatoes piled in a simple crust and slowly baked. With my CSA's annual picnic coming, I made one to take and share:

Step 1: Make the Dough
Piecrust has a reputation for being tricky and difficult. Many years ago a friend taught me to make it in the food processor, which takes out much of the intimidation, at least for me. Just put the flour(s) into the machine, add a pinch of salt and the fat, and use bursts to combine until it is like grains of sand. I generally start with a cup to a cup-and-a-half of flours and one-third as much butter, or butter and chevre, or whatever other fat(s) I am using:

You can also use oil, or vegetable fat, or lard, or whatever. The key is to cut up a solid fat into smaller pieces, which are easier to combine, and to use bursts, not running the machine constantly. If you do that and are using gluten-containing flours it gets gummy and tough. I often add some cornmeal to my mixture because I like the texture it adds. Sometimes I add some of the herbs to the dough - basil, thyme, savory, and sage are good choices.
Oh - I mentioned "if" and "gluten-containing flours"! Yes, you can use almost any combination for this recipe. So if you don't eat gluten, use other flours. If you don't do dairy, use vegetable fat or nut oil or olive oil or whatever. It's flexible. Your dough might be a bit more crumbly, but since we're not doing a raised dough the flours don't matter as much as they might otherwise.
Then, with the machine running, add ice water through the feeding tube. I put some ice and water into a measuring cup and dribble in from the spout. Start with a couple of tablespoons and add more carefully. If you put too much in, the dough gets gloppy. If you think it's close, stop the machine and open it and pinch the dough. When it's about the same feeling as your earlobe, it's right.

I am not more precise on the amount of ice water that you need because it depends upon the flours and the fat. You will need less if you use oil. You will need more with some flours than others, or if the weather has been very dry as your flour may be drier. You can always add a spoonful or so of water if needed. And if you do add too much? Either add in some more flour (or grated dry cheese) or do a pat-in instead of trying to roll out the dough. It will take a bit longer to bake.
Step 2: Constructing the Tart
Roll out the dough to fit into your pan. Sometimes I put a bit of cornmeal on the counter for the last roll, again to add texture. Otherwise I just use lots of flour. In the righthand picture the dough contains some basil and was rolled out with cornmeal mixed into the flour.
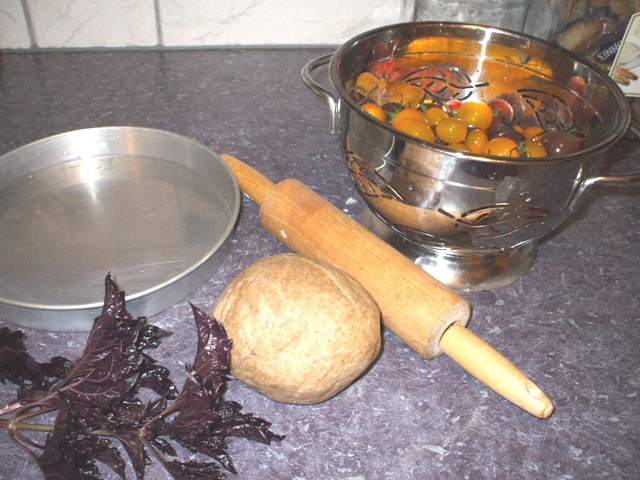 |
| The leaves are purple basil that I couldn't resist buying at the farmer's market because it is pretty. I had eaten a lot of my tomatoes so this is a rather small tart - make it as big as you like. |
 |
| There is basil in this dough. I learned last year that using a tart pan with a removable bottom is a BIG help when serving. |
Then you add the tomatoes. Mostly I use tiny ones - grape tomatoes, cherry tomatoes. But earlier this summer I wanted to make one and I didn't have too many of the little ones.
 |
| My CSA also gave us eggplant and very large heads of garlic. The tomato in the sandwich at the top is from this delivery. |
 However, my CSA had given us a number of what they call "paste tomatoes" which have more flesh and less moisture, and I thought they would be perfect to use as a bottom layer, in slices, as shown in the photo at the right:
When I just have the small ones, I will cut larger ones in half, as I did with the "black" tomatoes around the rim in this tart:


I added a sprinkle of chopped basil and kosher salt to the first layer. You can sprinkle herbs in by layers or mix them in wherever you like, or leave them out.
As you can see, sometimes I make designs and sometimes I just pile in as many tomatoes as I can:


Step 3: Baking the Tart
This can be tough, because it takes about two hours. The recipe has 100 minutes, I sometimes do a bit more if I have piled the tomatoes in especially thickly. Do NOT be tempted to "speed it up" with a higher temperature, you will just burn everything. Keep the oven at 300-325(F) degrees and be patient. In fact, unless you are making a small tart, don't even bother to look until 90 minutes have passed.
The goal is to have the tomatoes slowly roasting and carmelizing slightly. The end result, as you can see from this photo, is to keep it juicy but to have the tomato flavours concetrated and richer:

Another good thing about this tart is that it can be served hot, warm, or cold. It can be the vegetable side dish or the main course. Add some salad, and it's a meal.
One guess what I'll be doing with these heirlooms from Urban Oaks Organic Farm?

No comments:
Post a Comment